Có rất nhiều bài viết chia sẽ cách upload ảnh lên wordpress, tuy nhiên những
chia sẽ đó áp dụng theo cách upload file nên nhìn không đẹp và không chuyên
nghiệp cho lắm. Đặc biệt là khi bạn upload hình ảnh đó lên rồi mà lỡ tắt hay gì
đó thì bạn lại phải mở vào thư viện ảnh của wordpress để lấy lại đường link của
ảnh đó.
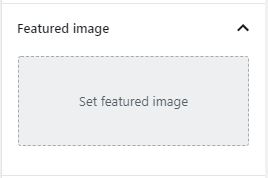
Bạn muốn chức năng upload ảnh chuyên nghiệp như mặc định của wordpress
trong Featured image của bài đăng. Khi bạn bấm nút thì thư viện ảnh của
wordpress mở ra và bạn có thể tải ảnh lên thư viện bằng cách upload hoặc có
thể chọn một hình ảnh bất kỳ trong thư viện.
Sau thời gian tìm tòi thì mình đã thấy được một thứ có thể giúp các bạn làm
cái nút upload ảnh lên thư viện wordpress siêu đẹp.
Trước hết bạn phải tạo một cái nút như hình bên dưới.
Với đoạn code html sau:
<div class="attachment-media-view"><button type="button" id="image-btn" class="button-add-media">Set featured image</button><div id="action-btn" class="actions"></div></div><input id="image-url" type="hidden" name="image_url" />
<button type="button" id="image-btn" class="button-add-media">Set featured image</button>
là phần chính của nút upload ảnh lên thư viện wordpress. Khi bạn bấm vào đây
thì thư viện wordpress sẽ được gọi ra cho bạn upload ảnh hoặc chọn ảnh có sẵn
từ thư viện. Và sau khi bạn chọn ảnh thì đây cũng là nơi hiển thị ảnh mà bạn
đã chọn.
Với dòng
<div id="action-btn" class="actions"></div>
thì đây là dòng giúp hiển thị các nút như xóa ảnh hoặc thay ảnh khác,....
Và dòng
<input id="image-url" type="hidden" name="image_url" />
Là dòng đặc biệt quan trọng là nơi lưu đường link của hình ảnh và nó
quan trọng sao thì bạn tự tìm hiểu nhé.
Để những thứ trên hoạt động một cách trơn tru thì dĩ nhiên cần phải có
một đoạn javascript như bên dưới đây.
<script>// JavaScript to launch media uploader, should be enqueued in a separate filejQuery(document).ready(function($){var mediaUploader;$('#image-btn').click(function(e){e.preventDefault();// If the uploader object has already been created, reopen the dialogif (mediaUploader) {mediaUploader.open();return;}// Extend the wp.media objectmediaUploader = wp.media.frames.file_frame = wp.media({title: 'Featured image',button: {text: 'Set featured image'}, multiple: false });// When a file is selected, grab the URL and set it as the text field's valuemediaUploader.on('select', function() {attachment = mediaUploader.state().get('selection').first().toJSON();$('#image-url').val(attachment.url);$('#image-btn').html('<img id="preview-img" src="' + attachment.url + '"/>');$('#action-btn').html('<button type="button" id="remove-btn" class="button">Remove image</button>');});// Open the uploader dialogmediaUploader.open();});//remove image$('#remove-btn').live('click', (function () {$('#image-btn').html("Set featured image");$('#image-url').val('');$('#remove-btn').remove();}));});</script>
Nhiêu đó chưa đủ mà bạn cần phải thêm một đoạn css để sao cho nút nói
giống nhất với cái mặc định của thằng wordpress nhé.
.attachment-media-view .button-add-media{cursor: pointer;background-color: #edeff0;color: #32373c;width: 200px;height:100px;position: relative;text-align: center;cursor: default;border: 1px dashed #b4b9be;box-sizing: border-box;line-height: 1.6;padding:0;margin-top:10px;}.attachment-media-view .button-add-media:hover{background-color:#fbfbfc;cursor:pointer;}.attachment-media-view .button-add-media:focus{background-color:#fbfbfc;border-color:#007cba;border-style:solid;box-shadow:0 0 0 1px #007cba;outline:2px solid transparent}.attachment-media-view img{width:100%;height:100%;}#remove-btn{color: #0071a1;border-color: #0071a1;background: #f3f5f6;vertical-align: top;margin-top:10px;}


